OBS Studio
OBS Studio Setup: Best Settings, Bitrate, Audio Filters & Overlays
OBS Studio setup is the foundation of a professional-looking livestream. Whether you stream on Twitch, YouTube, Kick, or any RTMP platform, the right OBS Studio setup can dramatically improve your stream quality, stability, and viewer experience. From choosing the correct resolution and bitrate to organizing scenes, audio filters, and overlays, a proper OBS setup helps streamers avoid lag, messy layouts, and poor sound during live broadcasts.
OBS Studio remains one of the most powerful free streaming tools available today, but many beginners struggle with settings, scene organization, and overlay installation. This ultimate guide will walk you through the Top 10 OBS Studio setup steps every streamer should follow to build a stable, professional stream.
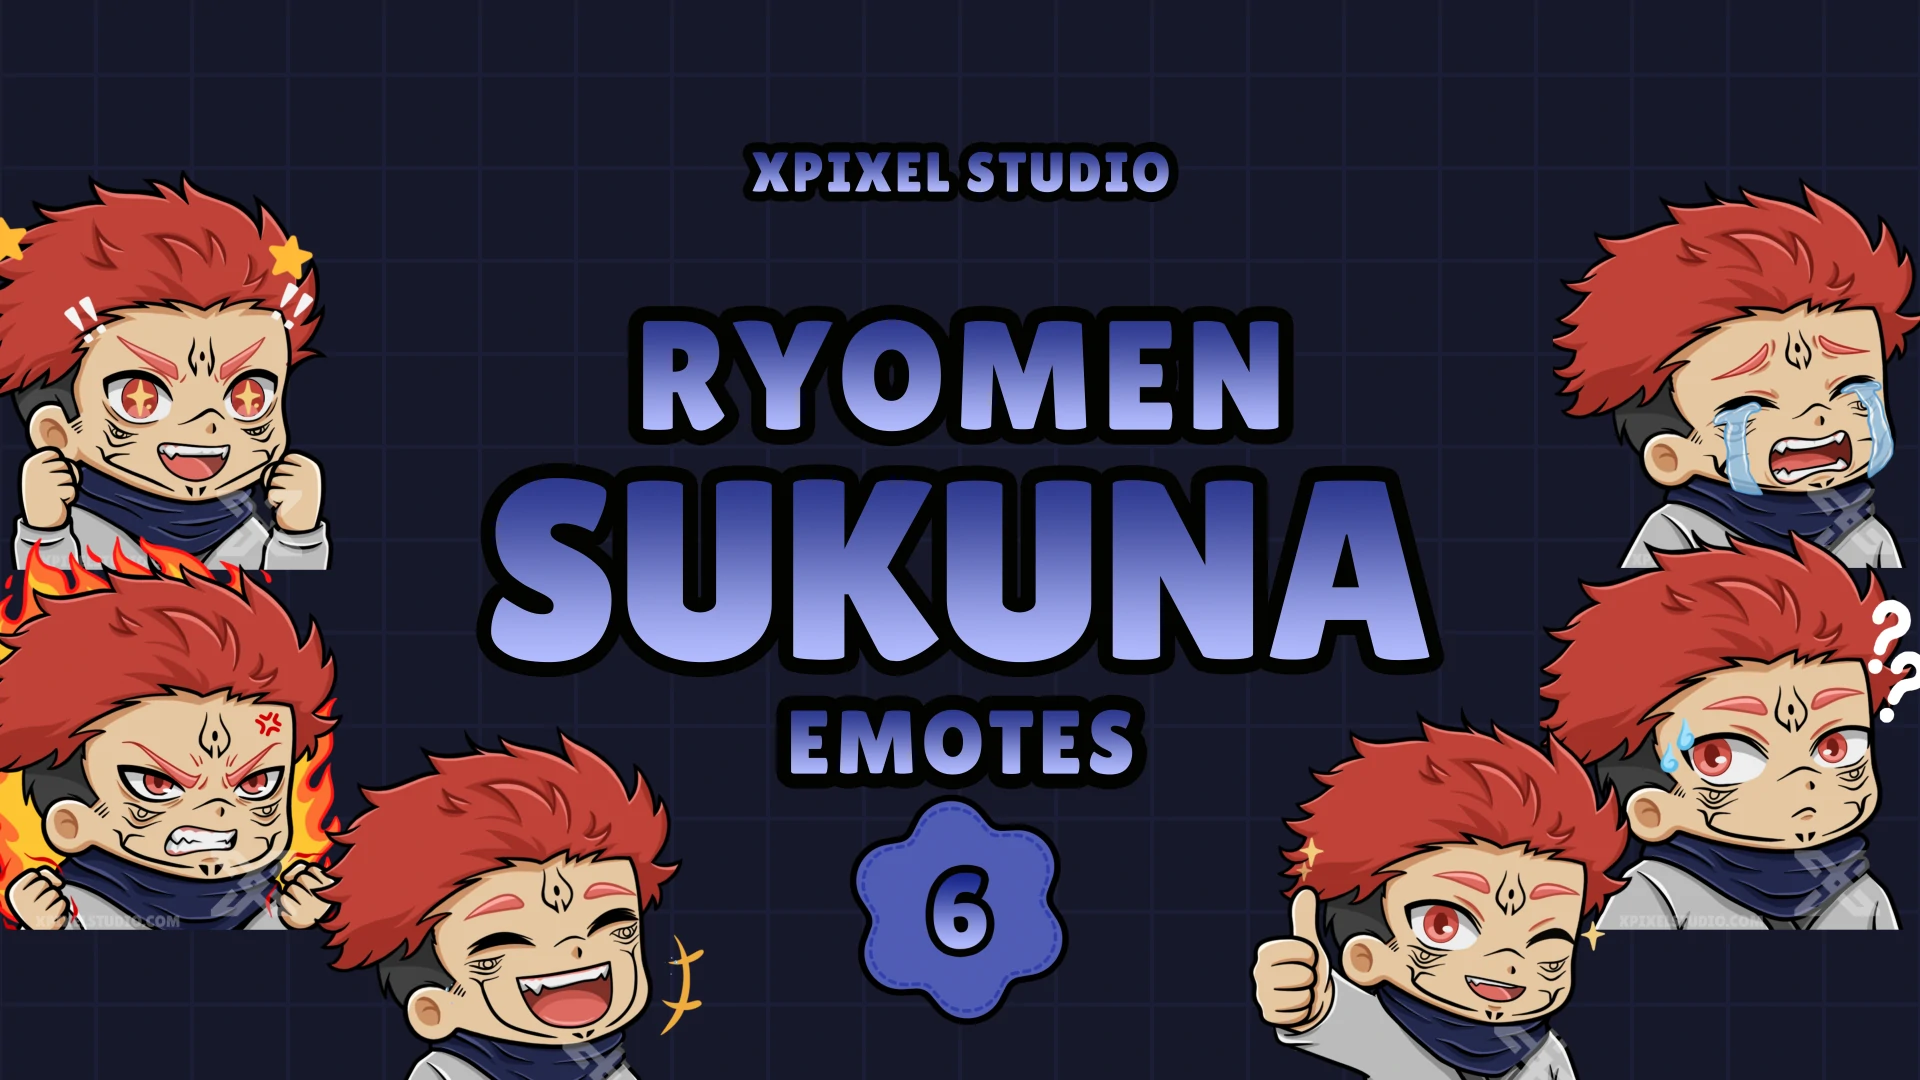
If you want to instantly upgrade the visual quality of your stream without spending hours designing layouts, you can explore professionally designed stream assets in the XpixelStudio streaming shop. High-quality overlays, alerts, and transitions can help your stream look polished while you focus on building great content.
Before You Touch OBS: What You Need (Minimal Gear, Maximum Results)
You don’t need a studio to look legit, but you do need the basics so your stream stays stable and your audio doesn’t drive viewers away.
Minimum recommended
- A stable internet connection (upload speed matters most)
- A PC capable of running your game/app + OBS (or a console + capture card setup)
- A microphone (even a budget USB mic often beats most headset mics)
- Headphones (to avoid echo/feedback loops)
- Optional but huge: a simple light (small LED panel or ring light)
A practical rule from real streaming experience: viewers forgive “okay video” faster than they forgive bad audio. If you upgrade only one thing first, upgrade your microphone (and basic audio treatment).
OBS Studio Setup Top 10 – Ultimate Workflow
1) Install OBS the Right Way (And Don’t Skip the Auto-Config Wizard)
Start with a clean, stable baseline:
- Install the latest OBS Studio from the official OBS Project site.
- Open OBS and run the Auto-Configuration Wizard (usually appears on first launch).
- Choose your target: Streaming, Recording, or both.
- Let OBS test recommended settings.
Why this matters: the wizard creates a stable starting point based on your hardware and connection. It’s safer than copying “pro settings” that might not match your PC.
2) Set Canvas and Output Resolution (Avoid Stretched and Blurry Streams)
Go to: Settings → Video
- Base (Canvas) Resolution: your layout workspace (what you build scenes on)
- Output (Scaled) Resolution: what viewers receive
Common stable choices:
- Base (Canvas): 1920×1080 (most overlays are designed for this)
- Output (Scaled):
- 1280×720 for smoother performance on mid PCs
- 1920×1080 only if your PC + upload can handle it consistently
A smooth 720p stream will retain more viewers than a “1080p” stream that stutters, drops frames, or turns into pixel soup.
3) Choose Encoder + Bitrate Like a Pro (Without Guessing)
Go to: Settings → Output
Switch to Advanced mode for better control.
Encoder (simple guidance)
- NVENC (NVIDIA): best for many streamers because it offloads to the GPU
- AMD / Intel Quick Sync: great options if supported
- x264 (CPU): can look great but may overload your CPU, especially while gaming
If you stream and game on one PC, hardware encoders are often the most stable option.
Bitrate (practical starting points)
Bitrate must match your upload speed and platform limits. If your upload is unstable, lower bitrate before raising resolution.
Safe starter targets:
- 720p / 30 FPS: 2500–3500 kbps
- 720p / 60 FPS: 3500–5000 kbps
- 1080p / 60 FPS: around 6000 kbps (only if stable)
Best practice: use only about 60–70% of your real upload speed for streaming to keep headroom for network spikes.
4) Build ONE Clean Main Scene First (Then Expand)
Most beginners sabotage themselves by building too much too soon. Start with one stable “Main” scene:
Add only:
- Game Capture / Display Capture / Window Capture (choose what works reliably)
- Webcam (Video Capture Device)
- Mic (Audio Input Capture)
- Optional: Desktop audio (Audio Output Capture)
Test stability (CPU usage, dropped frames, audio balance) before adding overlays, browser sources, and animated elements.
5) Master Scene Organization (Naming, Grouping, and Nested Scenes)
As your stream grows, OBS becomes your control room. Organization prevents panic mid-stream.
Best practices:
- Name scenes clearly: Starting Soon, Just Chatting, Gameplay, BRB, Ending
- Name sources clearly: Mic, Game Audio, Webcam, Alerts, Chat Overlay, Overlay Frame
- Group sources (folders) for: overlays, alerts, camera, audio
Advanced “pro” move: create a nested scene (a scene used as a source) for elements you reuse everywhere, such as a combined Webcam + Frame + Alerts. This keeps everything consistent and makes future edits fast.
6) Audio Setup That Makes People Stay (Filters + Levels That Sound “Expensive”)
Audio is your trust signal. Great visuals with bad audio still feels low quality.
Target levels (quick guide)
- Mic peaks: around -10 dB to -5 dB (strong but not clipping)
- Game/music: lower than voice (voice should lead)
Recommended mic filters (in this order)
Right-click your mic source → Filters
- Noise Suppression (reduces fan/room hum)
- Noise Gate (closes mic when you’re not speaking)
- Compressor (evens out volume so whispers/laughs don’t spike)
- Limiter (hard cap to prevent clipping)
Tip: record a 30–60 second test and listen back with headphones. Adjust once, save forever.
7) Studio Mode + Hotkeys = “Professional Broadcast” Feel
Two OBS features can instantly upgrade your workflow:
Studio Mode
Studio Mode lets you preview changes before pushing them live. Perfect for adjusting sources, fixing overlays, or preparing transitions without showing mistakes on stream.
Hotkeys
Go to: Settings → Hotkeys
Set hotkeys for:
- Scene switching (Starting Soon → Gameplay → BRB)
- Mute/unmute mic
- Push-to-talk (optional)
- Start/stop stream and recording
This avoids mouse fumbling and makes your stream feel smooth and controlled.
8) OBS Tricks (Quick Wins That Make Streaming Easier)
A good OBS Studio setup is not only about settings—it is also about workflow. Small OBS tricks can save time, prevent mistakes, and make your stream feel much more professional without requiring expensive gear or advanced technical knowledge.
Use Studio Mode Before Every Major Scene Change
Studio Mode lets you preview your next scene before pushing it live. This is one of the simplest ways to avoid accidental mistakes, broken overlays, or unfinished scene edits appearing on stream.
Build Reusable Nested Scenes
If you use the same webcam frame, alerts, or labels across multiple scenes, create one nested scene and reuse it everywhere. This keeps your branding consistent and makes future edits much faster.
Lock Important Sources Immediately
After placing your overlay, webcam frame, labels, or alerts, lock them. This prevents accidental dragging while you edit gameplay scenes or resize sources during a test stream.
Name Everything Clearly
Clean naming makes OBS easier to manage under pressure. Use names like:
- Gameplay Main
- BRB Scene
- Webcam Frame
- Mic Filtered
- Alerts Browser Source
This becomes extremely useful once your setup grows beyond a few basic scenes.
-
Keep One “Safe Scene” Ready
Always build one minimal backup scene with only:
- gameplay or display capture
- microphone
- webcam
If your main scene breaks, this gives you a fast emergency fallback.
Copy Filters Instead of Rebuilding Them
Once your mic filters sound good, reuse them instead of rebuilding them from scratch. This saves time and helps maintain consistent audio quality across profiles or scene collections.
Export Your Scene Collection and Profile
A professional-looking OBS Studio setup should always be backed up. Exporting your scene collections and profiles protects you from crashes, PC changes, or accidental reset problems.
Test New Overlays on a Copy Scene First
Never test a new overlay directly in your main scene during a live setup. Duplicate the scene first, test alignment and source order, then replace it only when everything works.
Keep Browser Sources Lightweight
Browser sources are useful, but too many of them can slow down your scene. Use only the widgets you actually need and remove anything that does not improve viewer experience.
Do a 60-Second Private Recording Before Going Live
This is one of the most underrated OBS tricks. A short test recording lets you catch:
- bad mic levels
- missing gameplay audio
- overlay misalignment
- webcam framing issues
- performance problems
A one-minute test can save an entire stream.
9) Overlays, Alerts, and Widgets (Clean Layer Order That Never Breaks)
Overlays make streams look professional—but messy overlays kill clarity. The most important rule is layer order.
Layer order rule: sources at the top appear in front of sources below them.
A clean default order (top → bottom):
- Alerts (Browser Source)
- Text / Labels
- Webcam (and webcam frame if used)
- Overlay design/frame
- Gameplay (capture source)
If you want a complete overlay installation walkthrough, follow the step-by-step section below.
10) Record While Streaming (Repurpose Content Without Extra Work)
OBS can stream and record locally at the same time. This is huge for:
- YouTube uploads
- TikTok/Shorts clips
- Highlight reels
- Sponsorship proof / portfolio content
Recording tips:
- Use higher recording quality than streaming if storage allows
- Choose a recording format your editor likes
- Save to a fast SSD if possible
11) Monitor Performance + Fix Issues Before Viewers Notice
OBS gives you real-time health signals. Use them during a test stream.
Watch these:
- Dropped frames (network)
- Skipped frames (encoding overload)
- Render lag (GPU overload)
- CPU usage and memory
If your stream stutters, fix in this order:
- Lower output resolution (1080p → 720p)
- Lower FPS (60 → 30)
- Lower bitrate
- Switch encoder (x264 → NVENC / hardware)
- Reduce heavy browser sources/animated overlays
- Close background apps
Stability beats “max settings.” Your goal is a stream that never collapses under pressure.
Recommended OBS Settings (Practical Presets You Can Start With)
Preset A: Beginner / Mid PC / Stable Results
- Output: 720p
- FPS: 30
- Bitrate: 3000–3500 kbps
- Encoder: Hardware encoder if available (NVENC/QSV/AMD)
Preset B: Strong PC + Solid Upload
- Output: 1080p
- FPS: 60
- Bitrate: ~6000 kbps (only if stable)
- Encoder: NVENC (common best choice for gaming streamers)
Preset C: “My stream keeps lagging”
- Output: 720p
- FPS: 30
- Bitrate: 2500–3000 kbps
- Encoder: Hardware encoder
- Reduce overlays/widgets temporarily
Best OBS Settings by Platform (Twitch, YouTube, Kick)
The best OBS Studio setup also depends on where you stream. While the core principles stay the same, each platform may perform better with slightly different bitrate, resolution, and encoder choices. Instead of copying one universal “pro setup,” use these practical starting points and adjust based on your PC performance and upload stability.
Quick Platform Guide
| Platform | Recommended Resolution / FPS | Safe Starting Bitrate | Encoder Suggestion | Best Use Case |
| Twitch | 1280×720 / 60 FPS or 1920×1080 / 60 FPS | 3500–6000 kbps | NVENC / hardware encoder | Stable livestreams with strong compatibility |
| YouTube | 1920×1080 / 30–60 FPS | 4500–9000 kbps | NVENC / hardware encoder | Higher quality streams if upload is stable |
| Kick | 1280×720 / 60 FPS or 1920×1080 / 60 FPS | 3500–8000 kbps | NVENC / hardware encoder | Smooth gameplay streams with room to scale |
| General RTMP platforms | 1280×720 / 30–60 FPS | 3000–6000 kbps | Hardware encoder | Safe starting point for most streamers |
Important note: platform recommendations can change over time, so always use these as practical starting points—not rigid rules. If your stream becomes unstable, reduce bitrate or output resolution before changing everything else.
Best OBS Settings for Twitch
For many streamers, Twitch works best when stability comes first. A smooth 720p60 stream often performs better than an unstable 1080p stream with dropped frames.
A practical Twitch starting setup:
- Output resolution: 1280×720 or 1920×1080
- FPS: 60 if stable, 30 if your system struggles
- Bitrate: start around 3500–6000 kbps
- Encoder: NVENC or another hardware encoder if available
- Priority: stable gameplay, clear audio, and minimal dropped frames
If your stream is lagging, lower bitrate first, then reduce resolution or FPS. For most single-PC streamers, consistency matters more than chasing “max quality.”
Best OBS Settings for YouTube
YouTube usually gives streamers more flexibility in bitrate, which can help improve visual quality—especially for fast-moving games. But higher bitrate only works if your upload speed and PC performance are stable.
A practical YouTube starting setup:
- Output resolution: 1920×1080
- FPS: 30 or 60 depending on system performance
- Bitrate: around 4500–9000 kbps as a starting range
- Encoder: NVENC or other hardware encoder
- Priority: sharper image quality without overloading your system
If your stream looks clean but OBS starts struggling, scale back to 720p or lower the FPS before making major changes.
Best OBS Settings for Kick
Kick streamers can usually start with settings similar to Twitch, then scale upward only after testing stability. The goal is still the same: smooth video, clean audio, and reliable performance.
A practical Kick starting setup:
- Output resolution: 1280×720 or 1920×1080
- FPS: 60 if stable
- Bitrate: around 3500–8000 kbps as a practical range
- Encoder: hardware encoder preferred
- Priority: stable broadcast and low system stress
If you are unsure where to start, use your Twitch-style settings first, then test small improvements one step at a time.
A Simple Rule for Any Platform
No matter where you stream, the best OBS settings are the ones your system can handle consistently. A stable stream with clean audio, balanced scenes, and no frame issues will outperform a “high-spec” setup that breaks under pressure.
How to Diagnose OBS Problems Fast: Dropped Frames vs Skipped Frames vs Render Lag
Many streamers say “OBS is lagging,” but the real problem is usually one of three different issues: dropped frames, skipped frames, or render lag. If you diagnose the wrong one, you can waste time changing settings that do not actually solve the problem.
Dropped Frames = Network Problem
Dropped frames usually point to internet instability, not PC performance. This often happens when your upload speed is too low, inconsistent, or under pressure from other apps on your network.
Common signs:
- Viewers say the stream freezes or buffers
- OBS shows dropped frames increasing
- Your PC seems fine, but the stream still stutters online
What to fix first:
- Lower bitrate
- Pause large uploads, cloud sync, or background downloads
- Use wired internet instead of Wi-Fi if possible
- Leave upload headroom instead of maxing out your connection
- Test another ingest/server if your platform allows it
Skipped Frames = Encoding Overload
Skipped frames usually mean your encoder cannot keep up. This is often caused by a weak CPU, overloaded GPU, or settings that are too aggressive for your system.
Common signs:
- OBS preview may feel fine at first, then stutter under load
- Game performance drops while streaming
- Encoding overload warnings appear in OBS
What to fix first:
- Switch to a hardware encoder if possible
- Lower output resolution
- Reduce FPS from 60 to 30
- Lower encoder workload or preset complexity
- Close heavy apps running in the background
Render Lag = GPU / Scene Load Problem
Render lag usually means your GPU is overloaded or your scene is too heavy. This often happens when games, browser sources, animations, and high-resolution overlays all compete for the same resources.
Common signs:
- OBS preview feels delayed
- Scenes with overlays or browser widgets feel heavier than simple scenes
- The stream struggles more during gameplay than during idle screens
What to fix first:
- Lower in-game graphics settings
- Limit game FPS
- Reduce heavy browser sources or animated overlays
- Simplify scene layout
- Disable unnecessary widgets during testing
Fast Troubleshooting Order
If your OBS stream is unstable, fix problems in this order:
- Lower output resolution
- Lower FPS
- Lower bitrate
- Switch to a more efficient encoder
- Reduce overlay complexity and browser sources
- Close background programs
This simple workflow prevents random guessing and helps you solve the actual bottleneck faster.
How to Install Twitch Overlays on OBS (Step-by-Step)
If you’re upgrading your stream look, installing Twitch overlays on OBS is one of the easiest ways to look more professional—once you understand file types and layer order.
What you need before installing an overlay
- OBS Studio installed (latest version recommended)
- Overlay files (commonly):
- PNG (static overlay)
- WEBM / MOV (animated overlay)
- Separate assets (webcam frame, bar overlays, stream labels, etc.)
- Stream resolution
Check your canvas resolution:
- 1920×1080 (most common)
- 1600×900
- 1280×720
Your overlay should match your OBS canvas size. If it doesn’t, it may look stretched or misaligned.
- Basic scenes
You should have (or plan to create):
- Starting Soon
- Live Gameplay
- Be Right Back
- Ending Screen
- Alert tool (optional but recommended)
If you want follow/sub/donation alerts:
- Streamlabs
- StreamElements
- Other browser-source alert tools
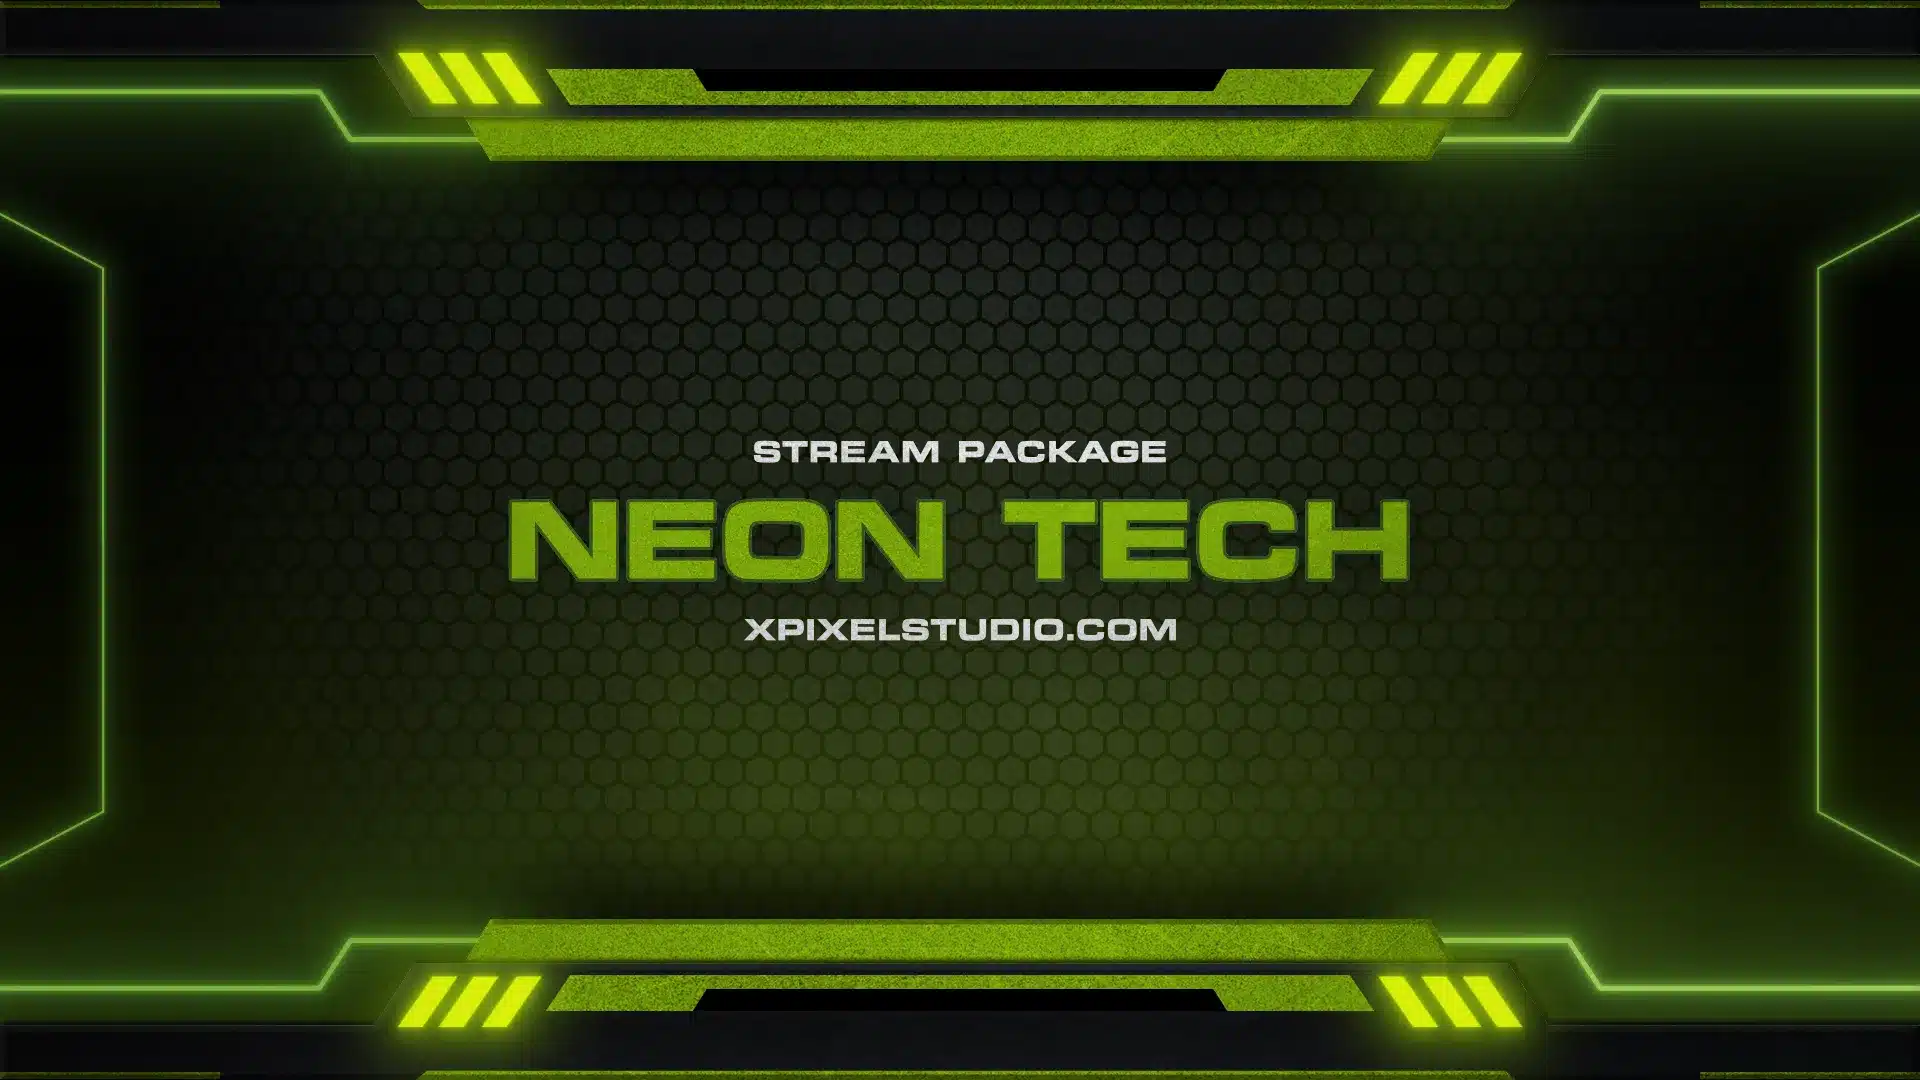
If you don’t already have overlay assets, you can browse a collection of professionally designed Twitch stream overlay packages that are ready to use with OBS. Most overlays are built for 1920×1080 canvas setups and include elements like webcam frames, panels, and scene layouts.
Step 1: Open OBS and create a scene
- Open OBS Studio
- In the Scenes panel, click +
- Name it (example: Gameplay Overlay)
This scene will hold gameplay, webcam, alerts, and overlay elements.
Step 2: Add your gameplay source first
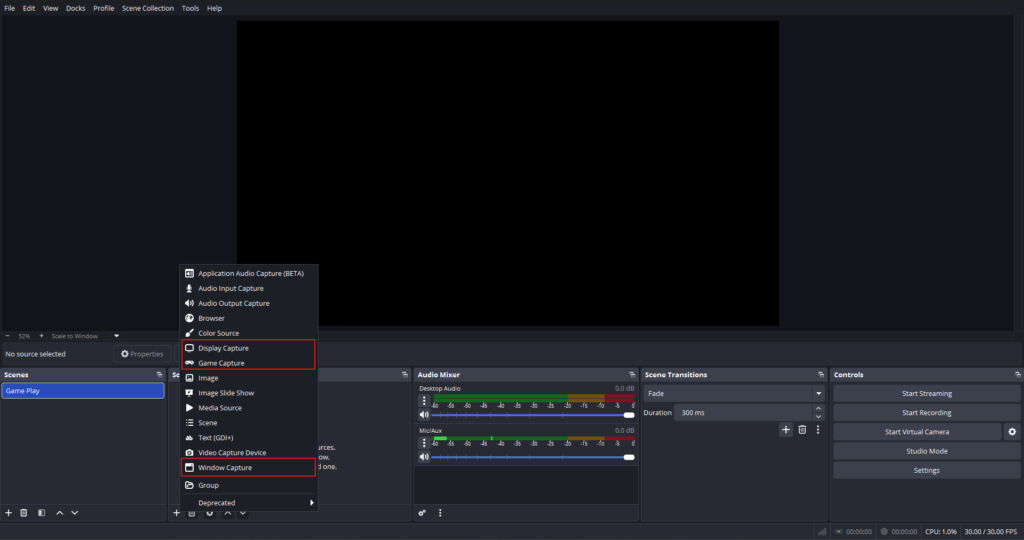
In Sources, click + and choose:
- Game Capture (for games)
- Display Capture (entire monitor)
- Window Capture (specific app)
Gameplay should sit behind your overlay.
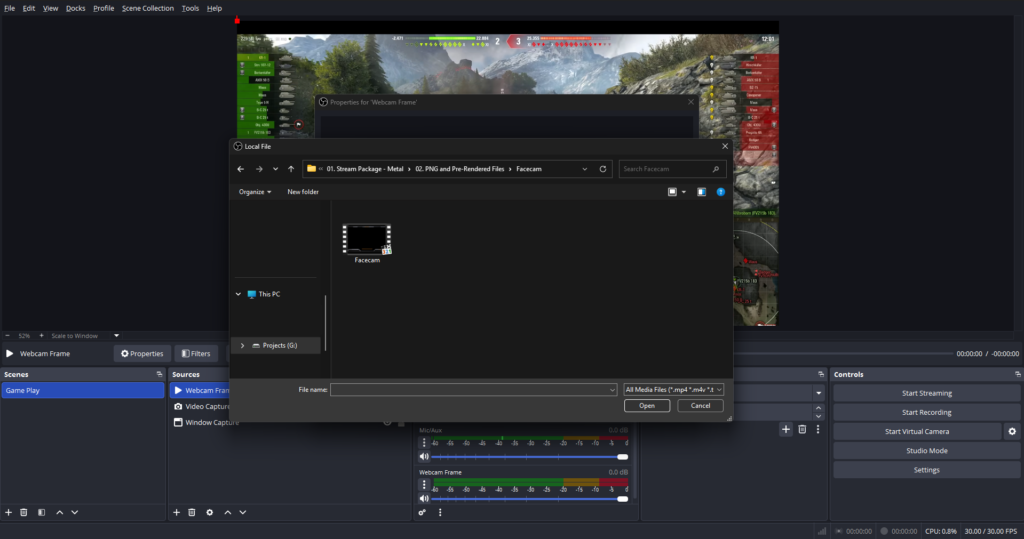
Step 3: Add your overlay file (Image or Media)
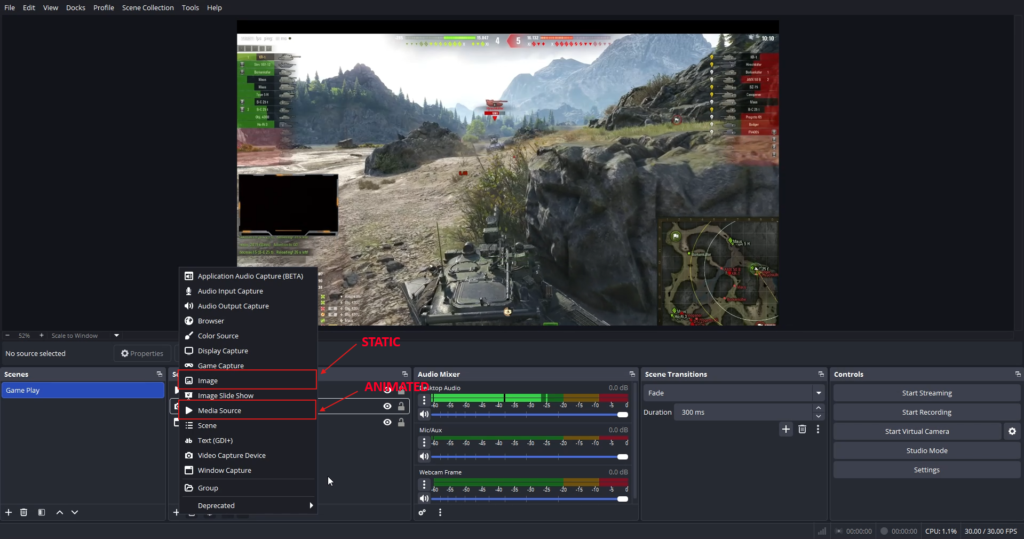
If your overlay is PNG (static):
- Sources → + → Image
- Name it (example: Main Overlay)
- Browse and select your PNG file
- Click OK
If your overlay is animated (WEBM/MOV):
- Sources → + → Media Source
- Name it (example: Animated Overlay)
- Browse and select your file
- Enable Loop (if needed)
- Enable Restart playback when source becomes active (optional)
- Click OK
Step 4: Resize and align the overlay
Right-click the overlay source → Transform
- Fit to Screen (best if overlay matches canvas ratio)
- Or manually drag corners if necessary
If the overlay was designed for your resolution, it should snap into place cleanly.
Step 5: Lock the overlay source
Once aligned:
- Click the lock icon next to the overlay source
This prevents accidental movement while editing.
How to Add Webcam, Alerts, and Text on Top of the Overlay
A clean overlay depends on correct layer order.
Recommended layer order (top to bottom)
- Alerts (Browser Source)
- Text / Labels
- Webcam (or webcam frame, depending on design)
- Overlay
- Gameplay / Screen
Some overlay packs include a webcam frame. In that case:
- Place the webcam source below the frame
- Place the frame overlay above the webcam
A) Add webcam to OBS
- Sources → + → Video Capture Device
- Choose your camera
- Resize and drag it into the overlay webcam area
If you use a webcam frame, place it above the webcam source for the framed look.
For streamers who want their alerts to match their overall stream design, using themed animated Twitch alerts can make your stream look far more cohesive. Matching alerts, overlays, and transitions help create a recognizable visual style for your channel.
B) Add alerts (Follower/Sub/Donation)
- Copy your alert URL from Streamlabs or StreamElements
- In OBS → Sources → + → Browser Source
- Paste the URL
- Set width/height (1920×1080 or custom)
- Position alert area
If alerts are hidden behind your overlay, move the Browser Source higher in the source list.
C) Add text (Labels, Names, Latest Follower)
For simple text:
- Sources → + → Text (GDI+) (Windows) or Text (macOS)
- Enter your text
- Choose font and size
- Position it on top of overlay labels
For dynamic text, you can use StreamElements/Streamlabs widgets or text-from-file methods.
Common OBS Overlay Setup Mistakes (And Fixes)
1) Wrong resolution / canvas size
Problem: overlay looks stretched or off-position
Fix: match your OBS canvas resolution to the overlay design
Settings → Video → Base (Canvas) Resolution
2) Incorrect layer order
Problem: webcam or alerts appear behind overlay
Fix: reorder sources in the Sources panel
Remember: top = front, bottom = back
3) Wrong source type
Problem: animated overlay doesn’t move
Fix: use Media Source for video overlays, not Image
4) Forgetting to lock sources
Problem: overlay shifts while editing
Fix: lock overlay and frame elements after placement
5) Overlay not filling screen properly
Problem: borders or misalignment
Fix: Transform → Fit to Screen
Also ensure overlay matches your canvas aspect ratio
6) Alerts not showing
Fix checklist:
- Correct alert URL pasted
- Browser Source visible
- Source placed above overlay if necessary
- Width/height large enough
- Test alert from alert platform dashboard
Common OBS Mistakes (And the Fix)
- Copying settings from random creators → use settings that match your PC and upload
- Too many sources/widgets early → build one stable scene, expand slowly
- Audio clipping → add limiter + set mic peaks below clipping
- Resolution mismatch overlays → match overlay design to canvas
- Not backing up scene collections → export profiles and scene collections regularly
- No pre-stream test → record a 60-second test and review
Pre-Stream Checklist (Use This Every Time)
- Correct scene active (not BRB by accident)
- Mic levels good (no clipping)
- Game audio balanced under voice
- Webcam positioned and framed
- Alerts tested (follow/sub/donation)
- No sensitive windows visible (Display Capture risk)
- OBS stats healthy (no dropped/skipped frames)
- Recording enabled (if repurposing content)
- Hotkeys working
- Sources locked (avoid accidental dragging)
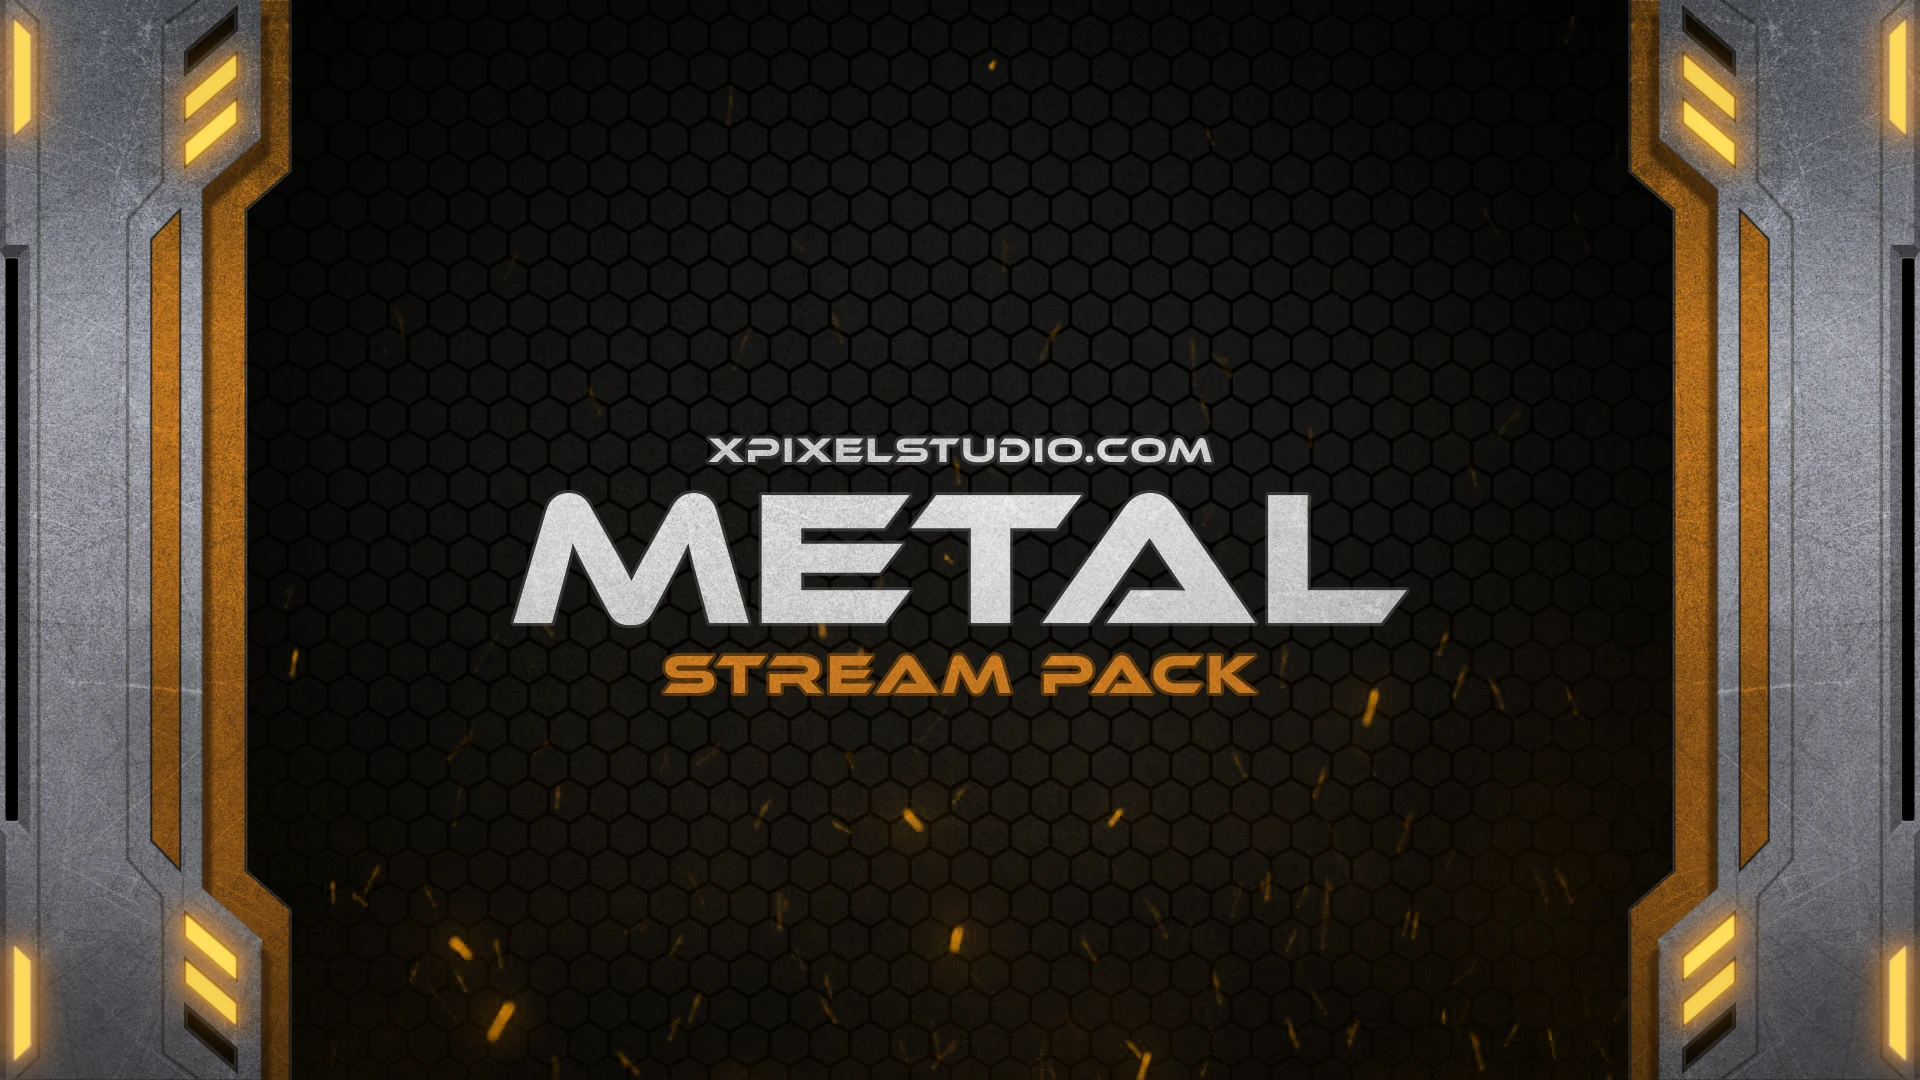
If you’re setting up your stream from scratch and want everything to match instantly, using a complete Metal Animated Stream Package can save hours of setup time. Full stream packages typically include overlays, alerts, webcam frames, panels, and transitions designed to work perfectly together inside OBS.
FAQ
What is the best OBS setup for beginners?
Start with 720p / 30 FPS, bitrate around 3000 kbps, and a hardware encoder if available. Build one clean main scene first, then expand.
How do I stop OBS from dropping frames?
Dropped frames usually mean network instability. Skipped frames usually mean encoding overload. Lower bitrate, reduce resolution/FPS, reduce heavy browser sources, then retest.
Which encoder should I use: x264 or NVENC?
If you have an NVIDIA GPU, NVENC is often the best balance because it reduces CPU load. x264 can look great but may hurt performance while gaming.
What bitrate should I use for 1080p 60fps?
Many streamers start around 6000 kbps if the connection is stable. Always match bitrate to your upload speed and platform limits.
What are the best OBS settings for a low-end PC?
For a low-end PC, start with 720p at 30 FPS, a bitrate of 2500–3000 kbps, and a hardware encoder if available. Reduce heavy overlays, browser sources, and background apps to keep your stream stable. A smooth stream at lower settings is better than a laggy stream at high quality.
How do I add overlays to OBS Studio?
Use Image Source for PNG overlays, Media Source for animated video overlays, and Browser Source for web-based overlays and alerts. Keep correct layer order so alerts/text/webcam stay above overlay and gameplay stays behind.
How can I make my stream look more professional fast?
Focus on clean audio (filters + levels), stable settings (no lag), and clear scenes (Starting/BRB/Ending + tidy gameplay layout). Then add a consistent overlay style.
Should I record while streaming?
Yes. Recording gives you material for highlights, YouTube uploads, and shorts without extra tools.
Can I use Twitch overlays on OBS Studio for free?
Yes. Free overlays work in OBS (PNG for static, WEBM/MOV/MP4 via Media Source), and OBS itself is free.
Our Products